A shed only lasts as long as the base under it. Put a timber shed straight on grass or soil and the floor draws up moisture, the bearers rot, and within a few years the whole thing sits unevenly and the door stops shutting. A proper base spreads the weight, keeps the timber clear of the ground, and gives you a flat, square platform to build on.
There are three common ways to do it in the UK: a poured concrete slab, paving slabs bedded on a sub-base, or a plastic grid system filled with gravel. This guide covers all three, then walks through laying a concrete base in full, including the formwork, a ballast and cement mix, levelling and how long to leave it before the shed goes on.
To work out how much ballast and cement to order, run your slab size through our ballast calculator before you buy.
Which base is right for your shed?
The best base depends on the size and weight of the shed and the ground you are working with.
Concrete slab
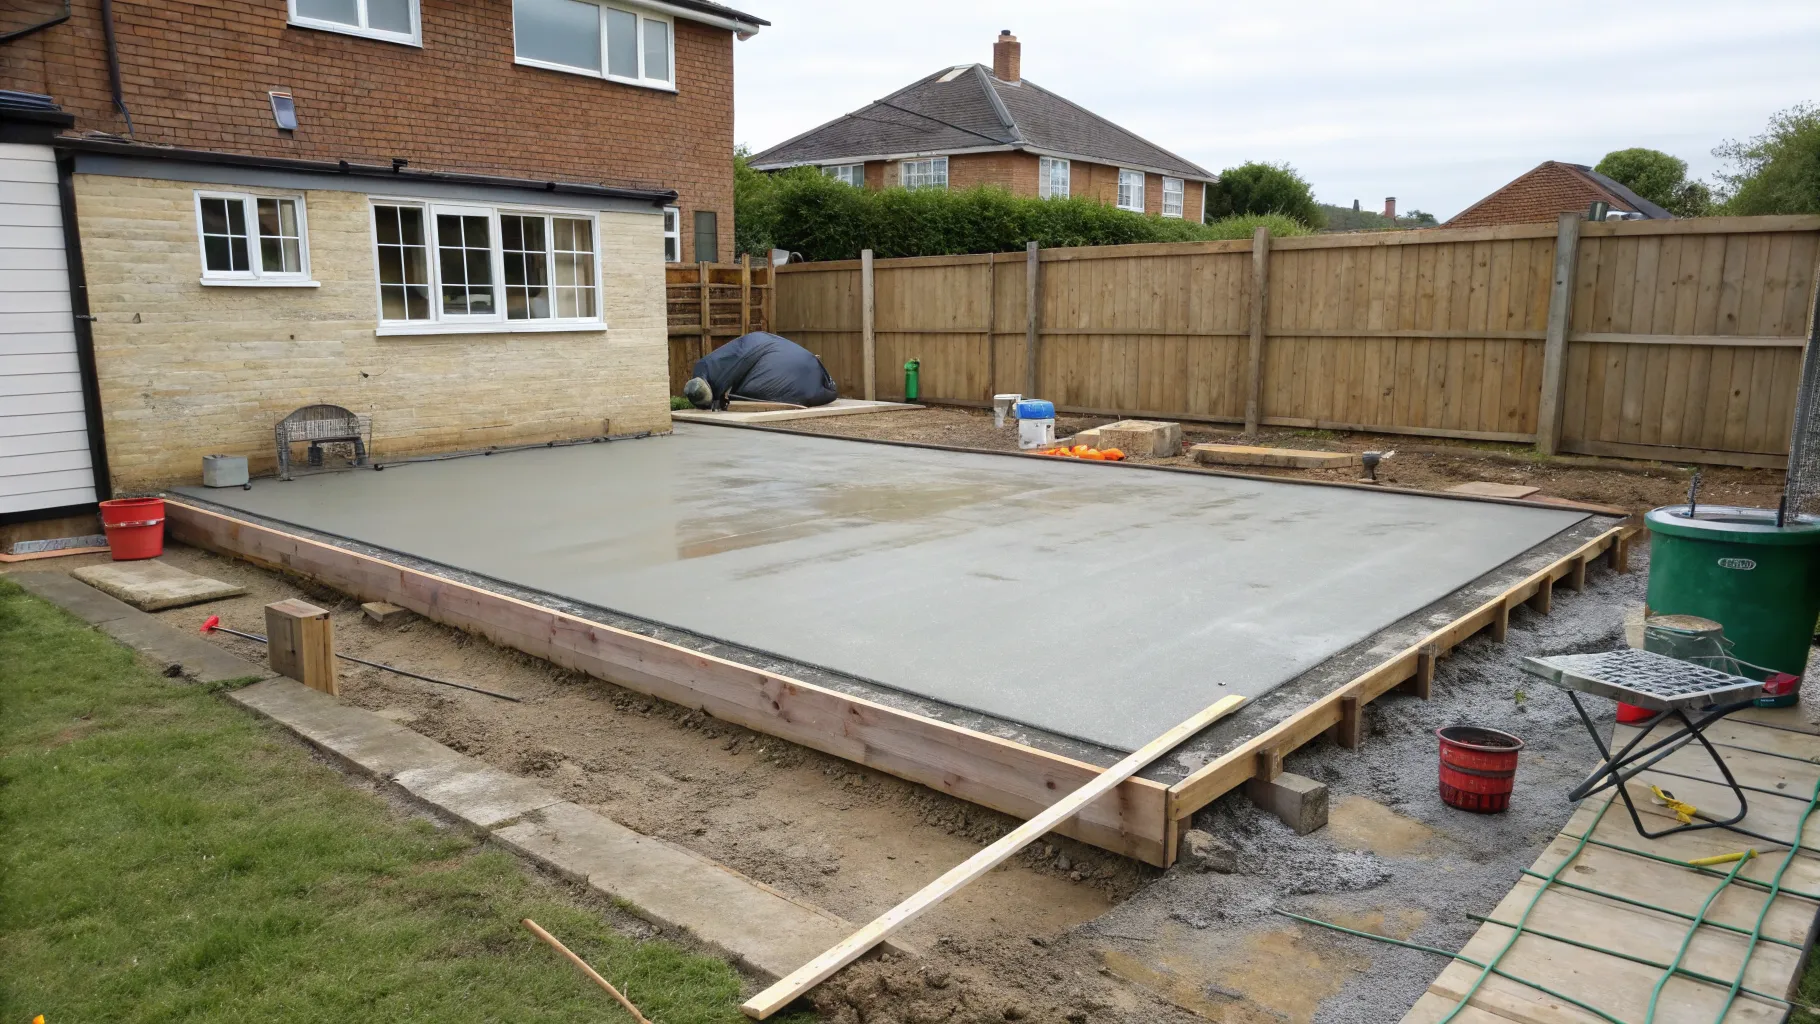
A poured concrete slab is the strongest option and the usual choice for anything heavy: large sheds, workshops, summerhouses and garden buildings on clay or sloping ground. It gives continuous, even support so the floor cannot flex or settle at one corner, and it lasts for decades.
The trade-off is effort. You need to dig out, build timber formwork, mix and barrow concrete, then wait for it to cure before the shed can go on. It is the most work of the three, but for a big or valuable building it is worth it.
Paving slabs
Paving slabs on a compacted sub-base are a sensible middle ground for small and medium sheds. There is no concrete to mix and no curing time to wait out, and if one slab settles you can lift and relay just that section. Done properly, on a firm sub-base with the slabs laid level and tight, a slab base barely moves.
The catch is the prep. The slabs are only as good as the layer beneath them, so the sub-base has to be dug out and compacted just as carefully as for concrete.
Plastic grid
Interlocking plastic grid systems are the quickest to lay. You clear and level the ground, lay a membrane, click the grids together and fill them with clean gravel. They are light, permeable so water drains straight through, and rot and pest proof. For a small shed on reasonably level ground, two people can lay one in a few hours.
They suit small to medium sheds. For a large or heavy building, or very uneven ground, a grid base can flex or wobble, so concrete or slabs are the safer choice (Buy Fencing Direct).
As a rough guide: small sheds up to about 6x4 work on any of the three; medium sheds are happiest on slabs or concrete; and large sheds of 10x8 and up really want a concrete slab.
How to lay a concrete shed base
The rest of this guide covers the concrete option in detail, since it is the one with the most steps to get right.
What you need
- All-in ballast and cement, or all-in ballast mix (work out quantities with the ballast calculator)
- MOT Type 1 sub-base aggregate
- Timber for the formwork, normally 100mm by 25mm boards, plus pegs
- A damp proof membrane (DPM), 1000 gauge polythene
- Steel reinforcing mesh (A142 or A193) for larger or heavier slabs
- A cement mixer (hire one for a base of any size), wheelbarrow, spade and bucket
- A vibrating plate compactor (wacker plate) for the sub-base
- A long, straight timber screed board, a spirit level, string line, pegs and a float
1. Set out and dig
Mark out the base. Make it at least the footprint of the shed; a slab the exact size of the shed, or up to 50mm smaller all round, keeps rainwater from pooling against the timber and dripping off the roof onto the slab edge. Square it up by measuring the diagonals: equal diagonals means a true rectangle.
Dig out the area to allow for your sub-base plus the concrete thickness. A typical domestic shed base is 100mm of compacted sub-base topped with 100mm of concrete, so you dig roughly 200mm below the finished slab level. On soft or clay ground, go deeper.
2. Lay and compact the sub-base
Spread MOT Type 1 across the base and compact it with a wacker plate in layers of around 50mm until you reach 100mm of solid, compacted sub-base. This is what stops the slab settling, so do not skip it. The surface should be firm and not move underfoot. For more detail on this layer, see our guide to laying an MOT Type 1 sub-base.
3. Build the formwork
Build a timber frame around the edge of the base to hold the concrete while it sets. Use straight boards set on edge, fixed to pegs driven into the ground on the outside of the frame so they do not get in the way of the pour.
Set the top edge of the formwork to your finished slab level. Check it is level all round with a spirit level, or set a deliberate slight fall of around 1:80 away from the door so water runs off. Check the corners are square again with the diagonals before you pour.
4. Lay the damp proof membrane
Lay a 1000 gauge polythene DPM over the sub-base and up the inside of the formwork. This stops ground moisture wicking up through the slab into the shed floor, which is what rots a timber shed from below. For a UK timber shed this is not optional: skip it and you can get rot in the floor within a few years.
If you are using reinforcing mesh, lay it on small spacers so it sits roughly in the middle of the slab thickness, not on the membrane.
5. Mix the concrete
For a shed base, a C20 (also sold as GEN3) mix is the standard. The common UK domestic mix using all-in ballast is 1 part cement to 6 parts ballast by volume, which gives roughly a C20 strength (Concrete2you). If you are mixing from separate aggregates rather than all-in ballast, the equivalent C20 mix is 1 part cement, 2 parts sharp sand, 4 parts gravel (1:2:4), which is the same total aggregate as the 1:6 all-in ballast mix.
Measure by volume with the same bucket each time so the ratio stays consistent. Add water a little at a time until the mix is workable but not sloppy: it should hold its shape, not run off the shovel. Once water hits the cement you have roughly two hours to get the whole base poured and finished, so for anything beyond a tiny base, either hire a mixer or order ready mix delivered.
Use the ballast calculator to turn your slab size into tonnes of ballast and bags of cement, or the concrete calculator to work out the total volume of concrete you need.
6. Pour, level and finish
Pour the concrete into the formwork, working from one end to the other and pushing it well into the corners so there are no voids. Fill slightly above the formwork.
Level it by resting your screed board across the top of the formwork and dragging it back and forth with a sawing motion, working the surplus off as you go. This is called tamping and screeding. Fill any low spots and screed again. Once it is level and flat, smooth the surface with a float. A wood float gives a slightly textured, less slippery finish, which suits a shed floor better than a glassy steel finish.
7. Cure the concrete
Let the slab cure slowly. Cover it with polythene so it does not dry out too fast, and on a hot day keep it shaded. In frost, cover it to keep it from freezing before it has set.
Curing timings vary with the weather, but as a guide: leave it at least 24 to 48 hours before walking on it, and leave the formwork in place and the shed off for around a week (Concrete2you). Concrete reaches most of its strength by 28 days, but you do not need to wait that long to put a shed on it. Rushing it in the first day or two is what causes cracks and a weak surface.
Recommended thickness
- Sub-base: 100mm of compacted MOT Type 1 under the slab; more on soft or clay ground.
- Concrete slab: 100mm is the standard for a domestic timber shed. Go to 150mm, with A142 or A193 reinforcing mesh, for a large shed, a workshop, a garden room or anything heavy.
A 100mm slab on a good sub-base carries an ordinary garden shed without trouble. Thickness and mesh buy you margin for heavier buildings and ground that moves.
Costs
Prices vary by region and supplier, so treat these as a rough current guide and get a local quote. Ballast is cheapest as a loose tipper load, roughly £35 to £55 a tonne delivered, with London and the South East at the higher end (ConcreteMath). Bulk bags of around 850kg to a tonne run about £48 to £68 a bag delivered. Cement is roughly £5 to £9 for a 25kg bag depending on brand and quantity.
As a worked example, a 3m by 2.5m slab at 100mm thick is about 0.75 cubic metres of concrete, which is in the region of 1.1 to 1.3 tonnes of ballast and around 8 to 10 bags of cement at a 1:6 mix. Your exact figures depend on the slab size, so check them before ordering.
To avoid buying short or paying to dispose of a surplus, put your measurements into the ballast calculator first. It turns your slab size and thickness into tonnes of ballast and bags of cement.
FAQ
How thick should a concrete shed base be?
100mm of concrete on 100mm of compacted sub-base is the standard for a normal garden shed. For a large shed, workshop or garden room, go to 150mm and add A142 or A193 reinforcing mesh.
What concrete mix should I use for a shed base?
A C20 (GEN3) mix. Using all-in ballast, that is 1 part cement to 6 parts ballast by volume. From separate aggregates it is 1 part cement, 2 parts sharp sand, 4 parts gravel (1:2:4).
Do I need a damp proof membrane under a shed base?
For a timber shed, yes. A 1000 gauge polythene DPM under the slab stops ground moisture wicking up into the floor and rotting the timber. Leaving it out is a common cause of shed floors failing within a few years.
How long before I can put the shed on a new concrete base?
Wait at least 24 to 48 hours before walking on it, and around a week before building the shed on it. Concrete keeps gaining strength up to about 28 days, but a week is usually enough for a shed.
Can I lay a shed base without concrete?
Yes. Paving slabs on a compacted sub-base, or a plastic grid filled with gravel, both work well for small and medium sheds and avoid mixing concrete and waiting for it to cure. For large or heavy buildings, concrete is the stronger choice.
How much ballast and cement do I need?
That depends on the slab size and thickness. As a rough guide, 0.75 cubic metres of concrete needs in the region of 1.1 to 1.3 tonnes of ballast and 8 to 10 bags of cement at a 1:6 mix. Work out exact quantities with our ballast calculator.
Get the quantities right first
A good shed base comes down to a few basics: a compacted sub-base, square and level formwork, a damp proof membrane, a consistent C20 mix, and curing the slab slowly before the shed goes on. Get those right and the base will outlast the shed.
Before you order, run your slab size through the ballast calculator for tonnes of ballast and bags of cement, or the concrete calculator for the total volume of concrete, so you buy the right amount first time.